Driver Here: Light Usage Agent .zip file
I made this driver quite a while ago, but forgot to post it here. I was prompted to post it after a post on the external Control4 user forums (c4forums.com).
Here’s the announcement I made in the Control4 Dealer forums, with info on the driver:
I’ve created a DriverWorks driver that handles light status by room / floor / project, to be used to view/manage lights being on / off using a 3 or 6-button keypad.
The driver watches all light levels in the project (that you have setup), and changes button bindings according to whether there are lights on for that room/floor/project. It also can be used to send commands on different button press combinations to turn on/off/restore all lights on that room/floor/project.
It scratches an itch I had for light tracking on 6-button keypads, that I know others have wanted as well.
This driver requires at least the 1.7.2 release.
To install the driver, copy the .c4i file in the .zip to your My Documents/Control4/Drivers directory, and restart ComposerPro. You can find the driver in the ‘Search’ tab, Device Type –Others–, Manufacturer ‘RyanE’, Model ‘Light Usage Agent’.
Don’t ask Control4 Tech Support about this driver. They don’t know anything about it. Use at your own risk. You’ll shoot your eye out, kid! 🙂
The Documentation Tab for the driver has full instructions, copied here (sorry for the ‘wall of text’):
———————————————————————————–
LIGHT USAGE AGENT
RyanE, March ’09
!!! PLEASE READ ALL THE FOLLOWING DOCUMENTATION BEFORE ASKING ANY QUESTIONS ABOUT THIS DRIVER. !!!
NOTE: This driver requires at least the 1.7.2 ‘release’ version of Director.
—————— Intro ——————
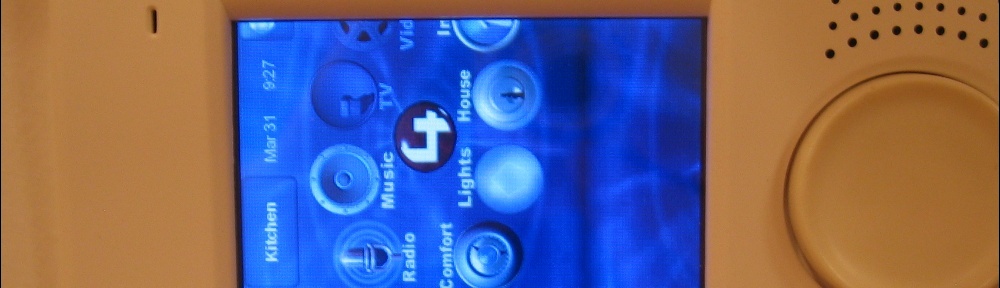
I’ve long wanted to display the status of lights being on throughout my house on my 6-button keypads, but with 7 or 8 keypads and 50+ lighting loads throughout the house, it was too much work to program changing LEDs on each keypad for every light load that changes. Even programming a single LED to be on when any light in the house was on was difficult, error-prone Control4 programming.
Instead of implementing ComposerPro programming to do that in my single case, I’ve created this DriverWorks driver to handle Lighting / Keypad / LED updates.
The driver pulls your project information from Director, and parses out the floors, their rooms, and the rooms’ Control4 lighting devices, and then tracks the current level of each lighting device. The driver calculates the percentage of lights on throughout the project, and on a per-floor and per-room basis, and continues to track lighting changes.
You can either use the device variables to do your own LED / keypad programming, or you can allow the driver to maintain tracking LEDs and use the keypad buttons to perform actions on groups of lights at your command.
—————— Functionality ——————
This driver was created to help dealers track lights per floor or per room, as well as to provide simple control of that lighting.
You should add this driver to your project *after* adding all rooms and lights to your project. All lights should be located (in the project) in the rooms they provide lighting for.
This driver creates bindings and variables based on the state of the project when the driver was added, and does NOT re-scan the project for changes after the initial load. This is by design, as the order of the variables and button bindings needs to be consistent in the project over director restarting. Because of this, if you change floors or rooms or dimmers in your project, you should *DELETE* this driver and re-add it to the project.
The driver has the following functionality:
* Allows for viewing the status of lights by floor or by room on LEDs of attached keypad buttons.
* Allows control of lights by floor or by room with buttons of attached keypads.
* Calculates status based on either the percentage of lights used, or the percentage of wattage being used.
* Calculates an estimate of the total watts being used by Control4 lighting devices, by project, floor, and room.
* Calculates an estimate of the cost of running the current lighting per hour and per day (assumes 24 hours of lighting at the current levels).
* Allows the user to change the colors displayed for each status.
* Provides the user with a tree-view of Light Usage (percentage and watts) for the entire project.
—————— Setup ——————
1) Verify that your system is updated to at least Director 1.7.2.106. You can do this by viewing any Navigator, under the Info — About page.
2) Add the driver to any room in the project. When the driver is added to a project, it creates keypad button bindings (connections) for every floor and room in the project, as well as a button binding for the project itself. You can view these button bindings under ‘Connections — Control/AV’ for the ‘Light Usage Agent’ driver.
3) To track/control lighting for a particular floor or room, bind that floor or room’s button binding (on the Connections — Control/AV page for this driver) to the button on each 2/3/6-button keypad that you want to control that floor or room. This will cause any assigned actions in the driver to be performed on the attached button(s) as well as causing the LED of the bound button(s) to change on light status changes. You can bind these floor and room bindings to as many keypads as you wish.
4) By default, the driver controls *all* Control4 lighting within the project. If you wish to exclude certain devices from being controlled and from using their status in calculations, enter their Device ID’s (separated by commas) in the ‘Exclude Device IDs’ property. To get a list of the Dimmer and Switch devices and their IDs within this project, click the ‘List All Switch Device IDs’ and ‘List All Dimmer Device IDs’ Buttons, found under the ‘Actions’ tab on the Properties Page. The lists show up in the ‘Lua Output’ pane of the ‘Lua’ tab. It is recommended that you enter ceiling fans, bathroom lights, etc. in the ‘Excluded Devices’ list, so they will not be turned on / off by Tap Actions.
5) Assign Tap Actions. You can assign actions performed based on the number of button taps. For the ‘Single Tap Action’ to ‘Quadruple Tap Action’ and the ‘Press and Hold Action’ properties, choose the action you want performed on the assigned lighting devices. These actions include: ‘Lights On’ (100%), ‘Lights Off’, ‘Lights Restore’, and ‘None’ (No action). Lights Restore will return the lights to the last value they had before an ‘Lights On’ or ‘Lights Off’ action was performed.
Example: If all the lights on a floor are set to certain levels, and you mistakenly call for ‘Lights Off’ on that floor, and realize the mistake, if you then call for ‘Lights Restore’, they will be restored to the previous values.
6) Track by Light Wattage. In order to be able to track by wattage of loads and also to calculate the percentage of lights on based on wattage, you must assign wattage values for each load in the project. To do this, click the ‘Print Watt Worksheet Template’ button on the ‘Actions’ tab on the Properties page. The worksheet shows up on the ‘Lua Output’ pane of the ‘Lua’ tab. The worksheet is valid Lua code, and is intended to be cut and pasted into the ‘Lua Command’ pane. To set wattage values, you must enter the values where the underscores (‘___’) are in the list, and cut and paste the entire list into the ‘Lua Command’ pane on the ‘Lua’ tab, and press the ‘Execute’ button. If all values are correct, you will see output in the ‘Lua Output’ window for each device, indicating that the watts values have been set. If you Print out the worksheet again, you will see the current values. The Watts values are saved in the Control4 project.
7) If you wish to calculate the percentage of lights in use based on Wattage, change the ‘Percentage Based On’ property to ‘Watts’.
Example: If you had two lights, one 40W, the other 400W, and you’re calculating based on percent, when the 40W light is on, the usage is 50%. If you’re calculating based on watts, the usage is 9%.
8) If you wish to display the estimated lighting hourly and daily cost, set your average energy cost, in cents/kWh in the ‘Cents per kWh’ Property.
9) If you wish to use different LED colors for the light usage updates, enter the color name or RGB value (i.e. Red = ff0000) in each color property. If you do not want the LEDS to track, enter ‘None’ as the color.
Pre-defined Colors: None, Black, White, Red, Yellow, Orange, Green, Blue, Aqua, Fuchsia, Gray, Navy, Purple, Silver, Teal, Peach, BubbleGum, DarkRed, DarkYellow, DarkOrange, DarkGreen, and DarkBlue.
Note: Not all colors look exactly the same on all keypads.
10) Light Usage Popups. If you want to display the current project usage tree, you can create popups (typically triggered by custom buttons) on Navigator displays, using the ‘LIGHT_USAGE_SUMMARY’ device variable for this driver.
— Optional —
11) Set LED Command. You can set the LEDs of all the buttons attached to different Button Link bindings with the ‘Set LED Color’ command. The parameters are the Button Link binding name (i.e. “Project Button Link” or “roomname Button Link”) and an LED Color or RGB value (i.e. ‘Red’ or ‘ff0000’).
12) Variables. You can use the following Device Variables in your Control4 programming:
String Variables:
* LIGHT_USAGE_SUMMARY: A tree-view of all the floors, rooms, and lights that are currently on in your project, as well as their current estimated wattage, if wattage is available.
* PROJECT_WATTAGE_STR: A variable with the current Wattage being used. Example: “280W”.
* PROJECT_COST_STR: A variable with the current estimated hourly and daily cost. Example: “Cost: 2.2c / hr — 52.2c / day”.
Number Variables:
* PROJECT_PERCENT: Number from 0-100 of the percentage of lights on in the project.
* PROJECT_WATTAGE: Estimated number of Watts currently being used by lighting in the project.
* *FLOORNAME*_FLOOR_PERCENT (for each floor): Number from 0-100 of the percentage of lights on for EACH floor.
* *ROOMNAME*_PERCENT (for each room): Number from 0-100 of the percentage of lights on for EACH room.
—————— Disclaimers ——————
*** THIS DRIVER IS NOT SUPPORTED BY CONTROL4. ***
Control4 Tech Support will NOT provide support for this driver.
Any questions and problems with this driver should be communicated directly to RyanE.
WARRANTY DISCLAIMER:
You are granted a nonexclusive license to use this driver for your own specific needs.
This driver was created by RyanE and is provided by RyanE for entertainment purposes only. This driver has not been thoroughly tested under all conditions. RyanE, therefore, cannot guarantee or imply reliability, serviceability, or proper functionality of this driver.
All functionality contained herein is provided to you “AS IS” without any warranties of any kind. The implied warranties of non-infringement, merchantability and fitness for a particular purpose are expressly disclaimed.
———————————————————————————–
Do you have driver to add wackup buttons for on and off light?
I’d like the customer can use by his salfe to control his light by using wakeup buttons.
You can search in Google “shabat clock” and see thre what I meen.
Thank you.